Connector Setup
This guide will help you set up connections to the 5 Power Platform connectors used by the Conscript app.
Prerequisites
The Conscript app installed from Microsoft AppSource. The AppSource package installs the following components:
- Conscript Custom Connectors Power Platform Solution v1.0.1
Conscript_1_0_1_0_managed.zip - Conscript Power Platform Solution v1.0.2
ConscriptCustomConnectors_1_0_2_0_managed.zip - A Configuration Migration Tool package containing Function and Function Parameter definitions
conscript-cmt-data.zip
- Conscript Custom Connectors Power Platform Solution v1.0.1
Conscript requires Premium licensing for Microsoft Power Automate and Dataverse.
Connections Overview
- Conscript Outlook Connection
- Connects to Microsoft 365 Exchange Online to send and receive e-mail. The account used in the connection must be licensed for Exchange Online and have Full Access and Send As permissions on every mailbox used by Conscript. Conscript will attempt to add those permissions for you automatically.
- Conscript Approvals Connection
- Allows Conscript to use native Power Platform Approvals when human approval is required for sensitive operations.
- Conscript Dataverse Connection
- Connects to the Power Platform Dataverse. The Dataverse provides backend database functionality for the app, as well as a front-end UI via a Model-Driven App.
- Conscript OpenAI Connection
- Connects to the OpenAI API to provide the AI backing for the app. An API key must be obtained from OpenAI.
- Conscript Exchange Connection
- Connects to the Exchange Online PowerShell API for mailbox provisioning and permissioning. If this connection isn't configured, all Exchange administrative tasks must be performed manually.
Connection References
The connections are packaged in the solution as Connection References. If you aren't prompted to update the Connection References during app installation, then you must do so manually:
- Navigate to Solutions in the same Power Platform environment where Conscript is installed: https://make.powerapps.com/
- Open the Default Solution.
- Click Connection References under Objects in the left-hand navigation pane.
- Select each Connection Reference that begins with Conscript and click Edit.
- If no Connection is listed, click + New connection and use the corresponding setup instructions below for the connector.
Connection Setup Instructions
Detailed instructions for configuring each connection can be found below.
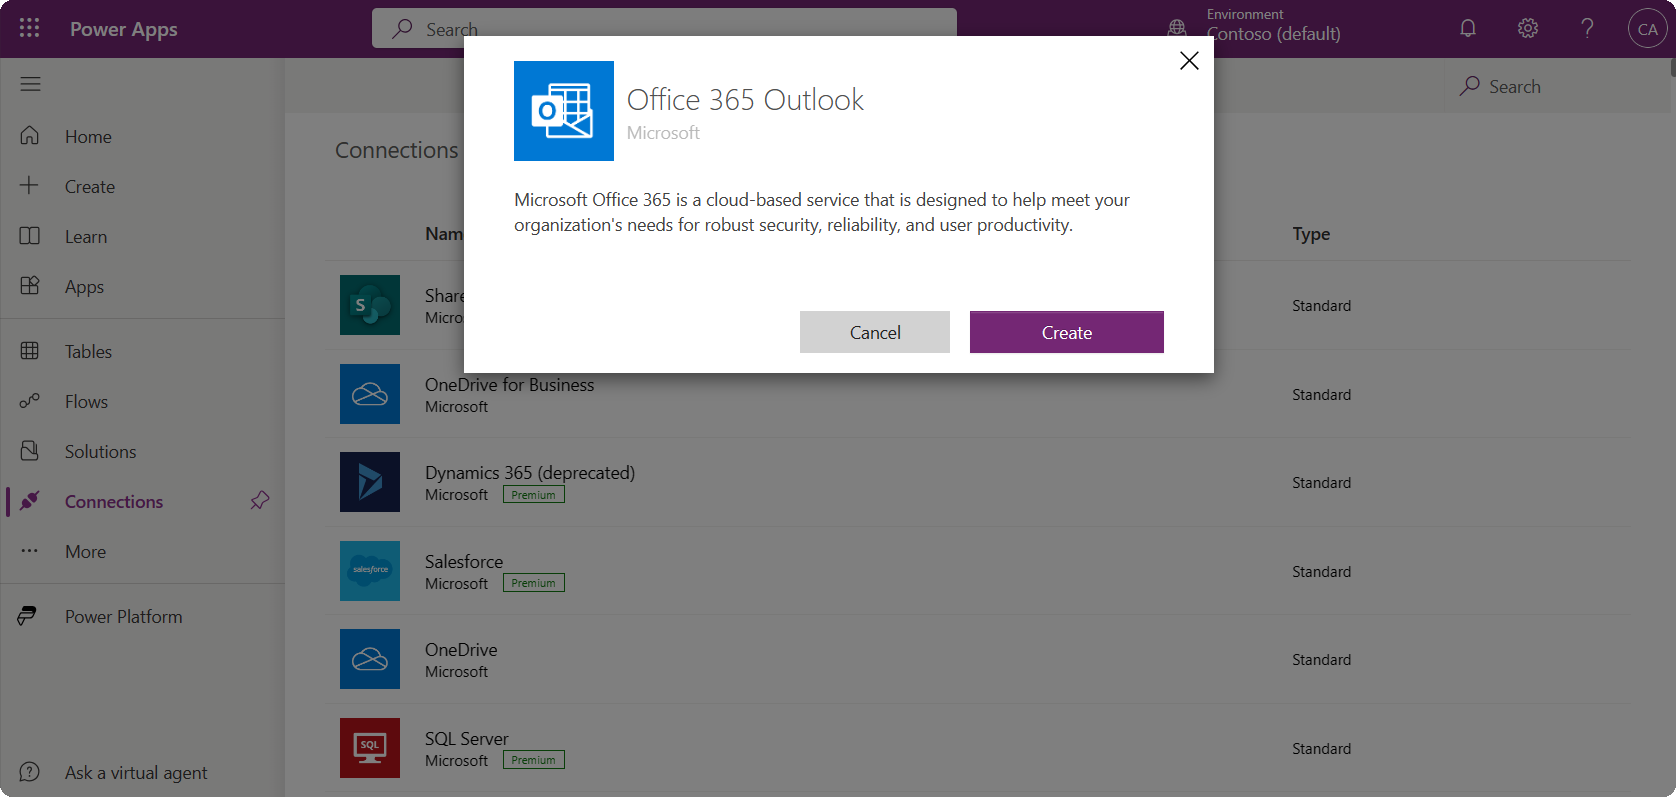
Outlook Connection
- Click Create and sign-in with an account that's licensed for Exchange Online when prompted.
Approvals Connection
- Click Create to create the connection.

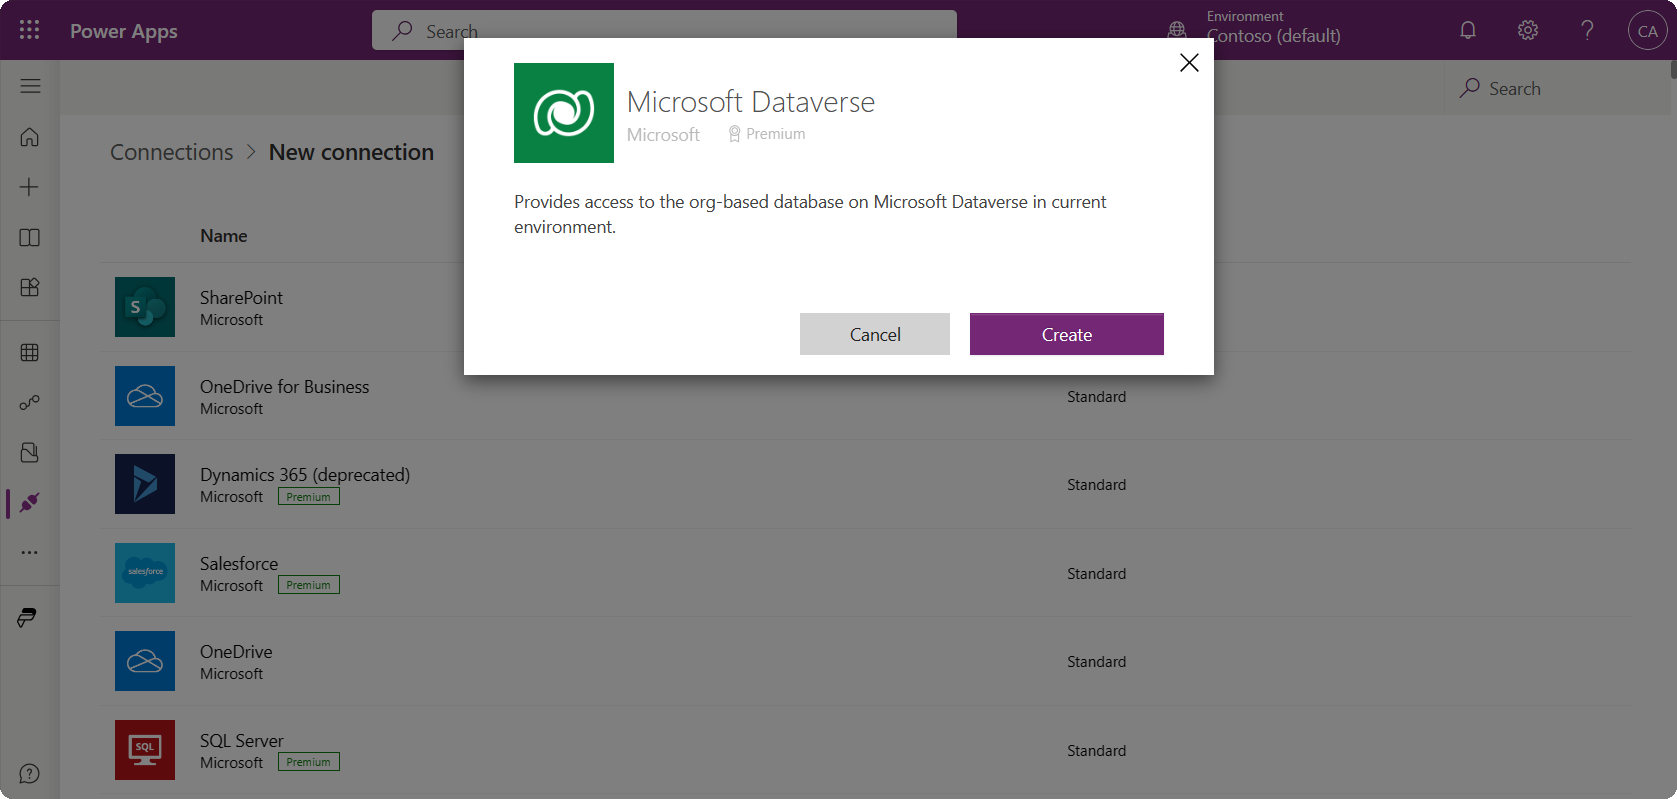
Dataverse Connection
- Click Create and sign-in with a privileged account that has access to the Dataverse environment where the Conscript app is installed.
OpenAI Connection
- Conscript's OpenAI Connector requires an API key from OpenAI. If you don't have one, sign up for a free account at OpenAI.com.
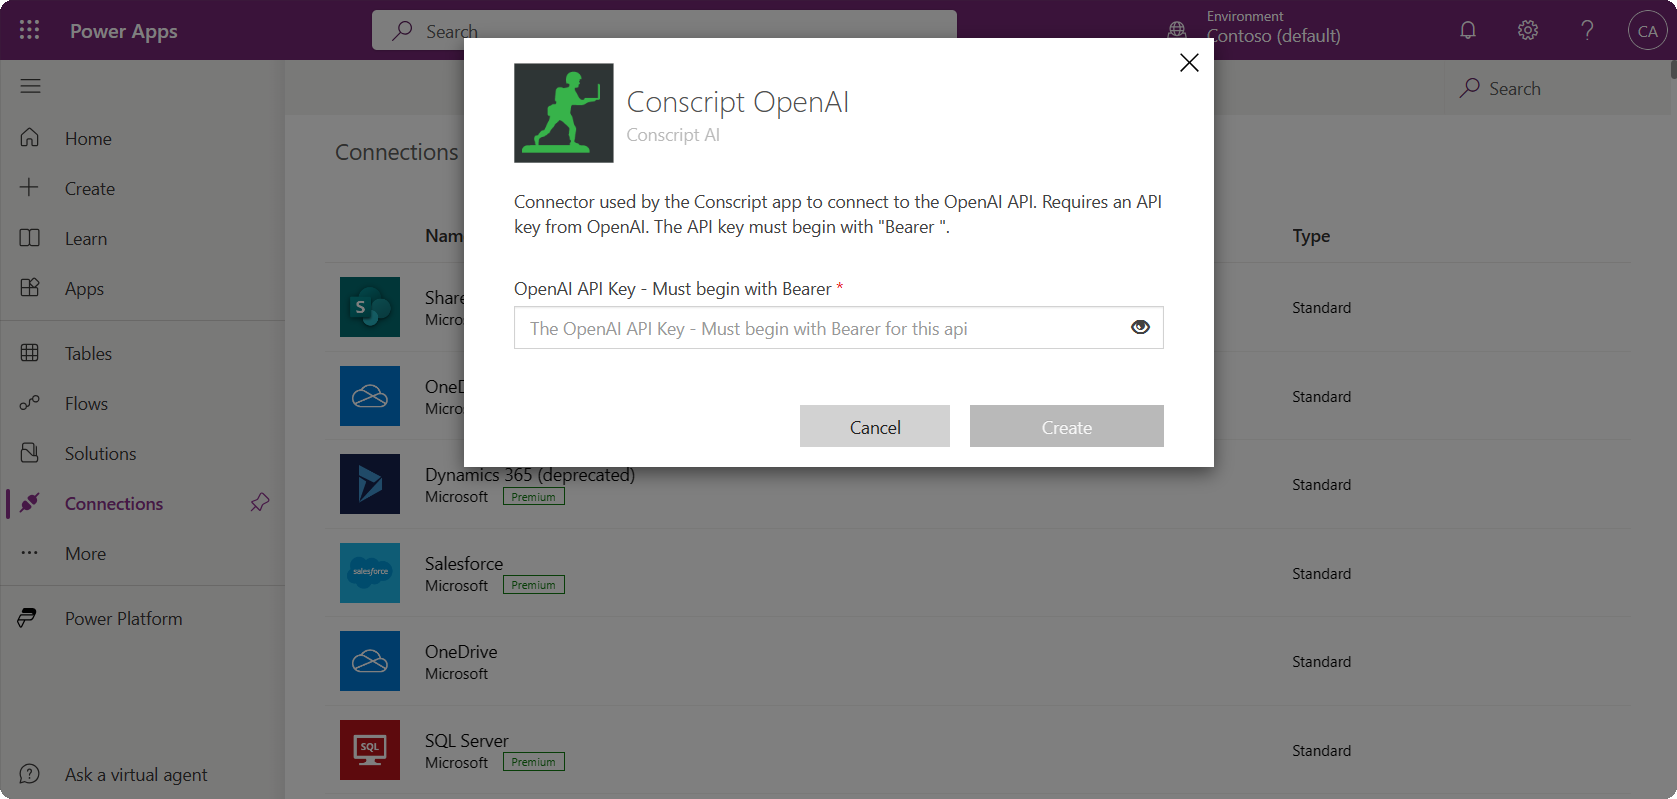
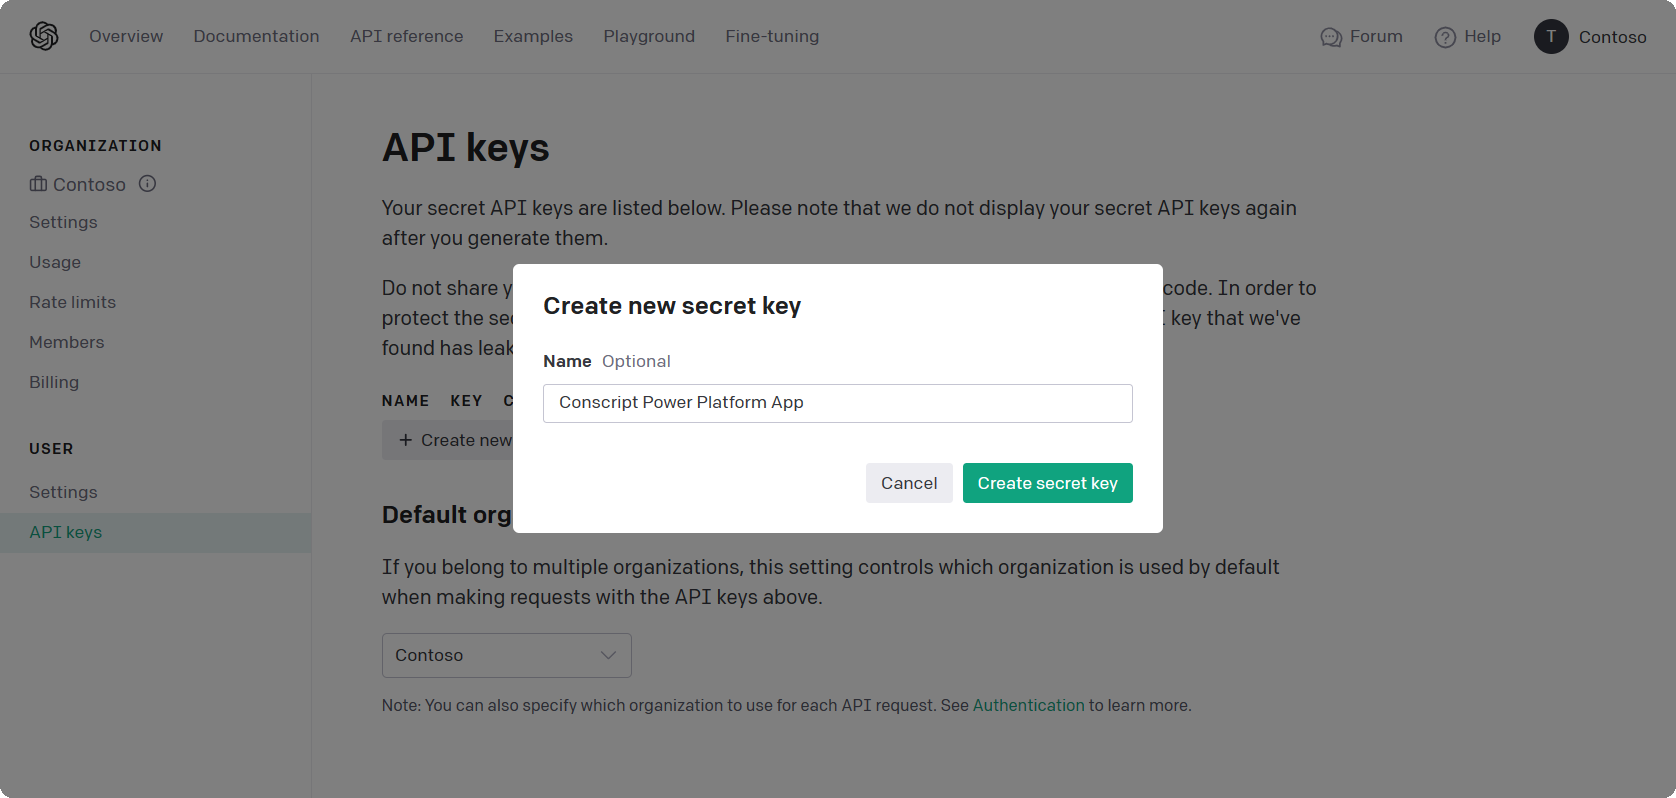
- Navigate to API keys within your OpenAI account and click Create new secret key.
Direct link: https://platform.openai.com/account/api-keys
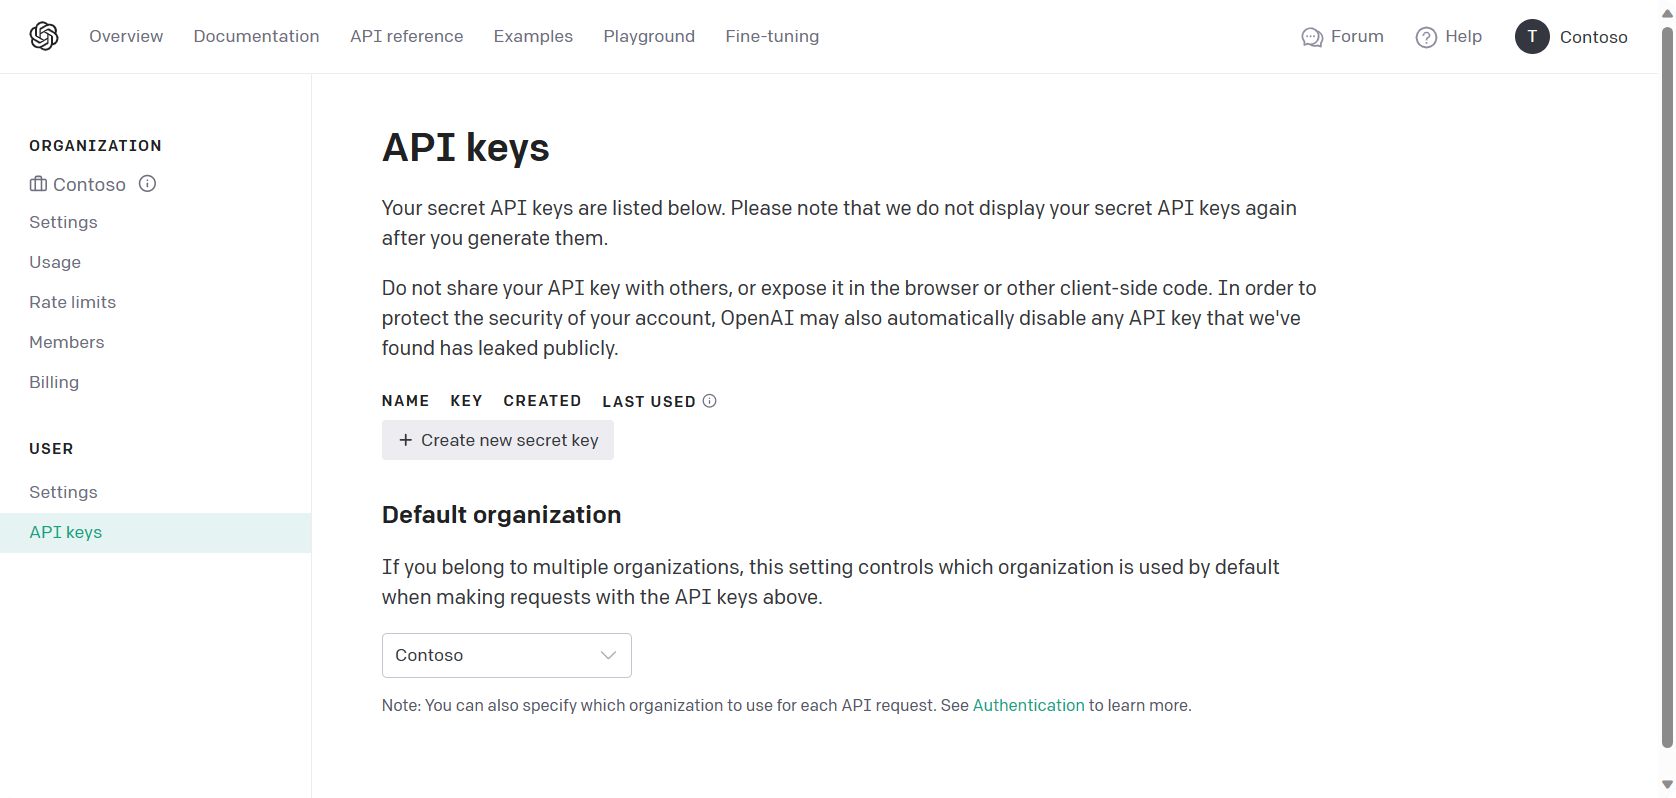
- Enter a descriptive name and click Create secret key.
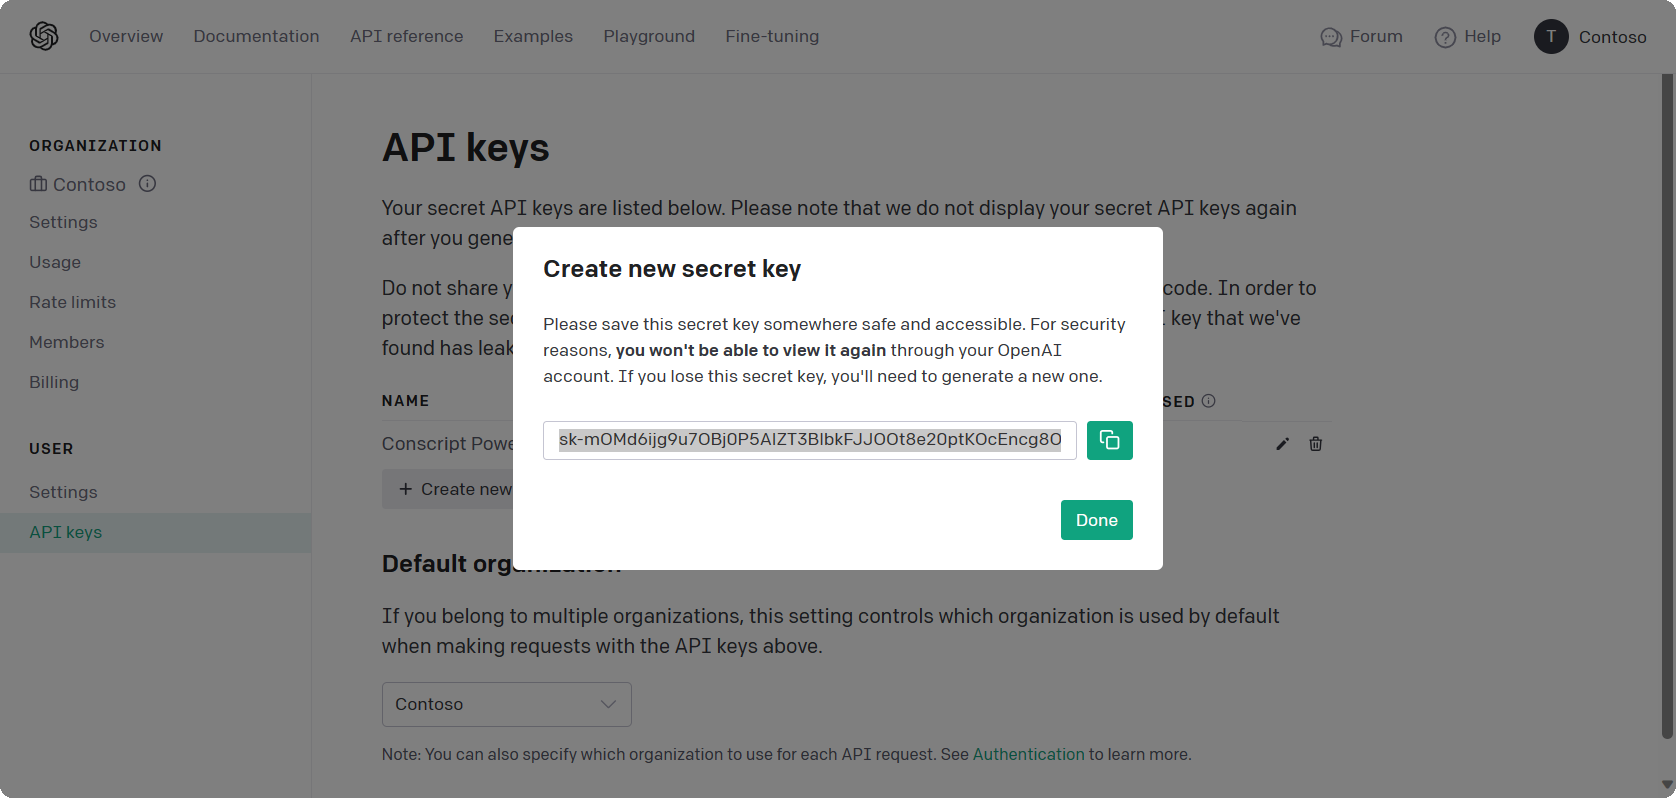
- Copy the secret key value for use in the Conscript connector.
Security Warning
Treat this secret key as a password. Be sure to store and transmit it securely.
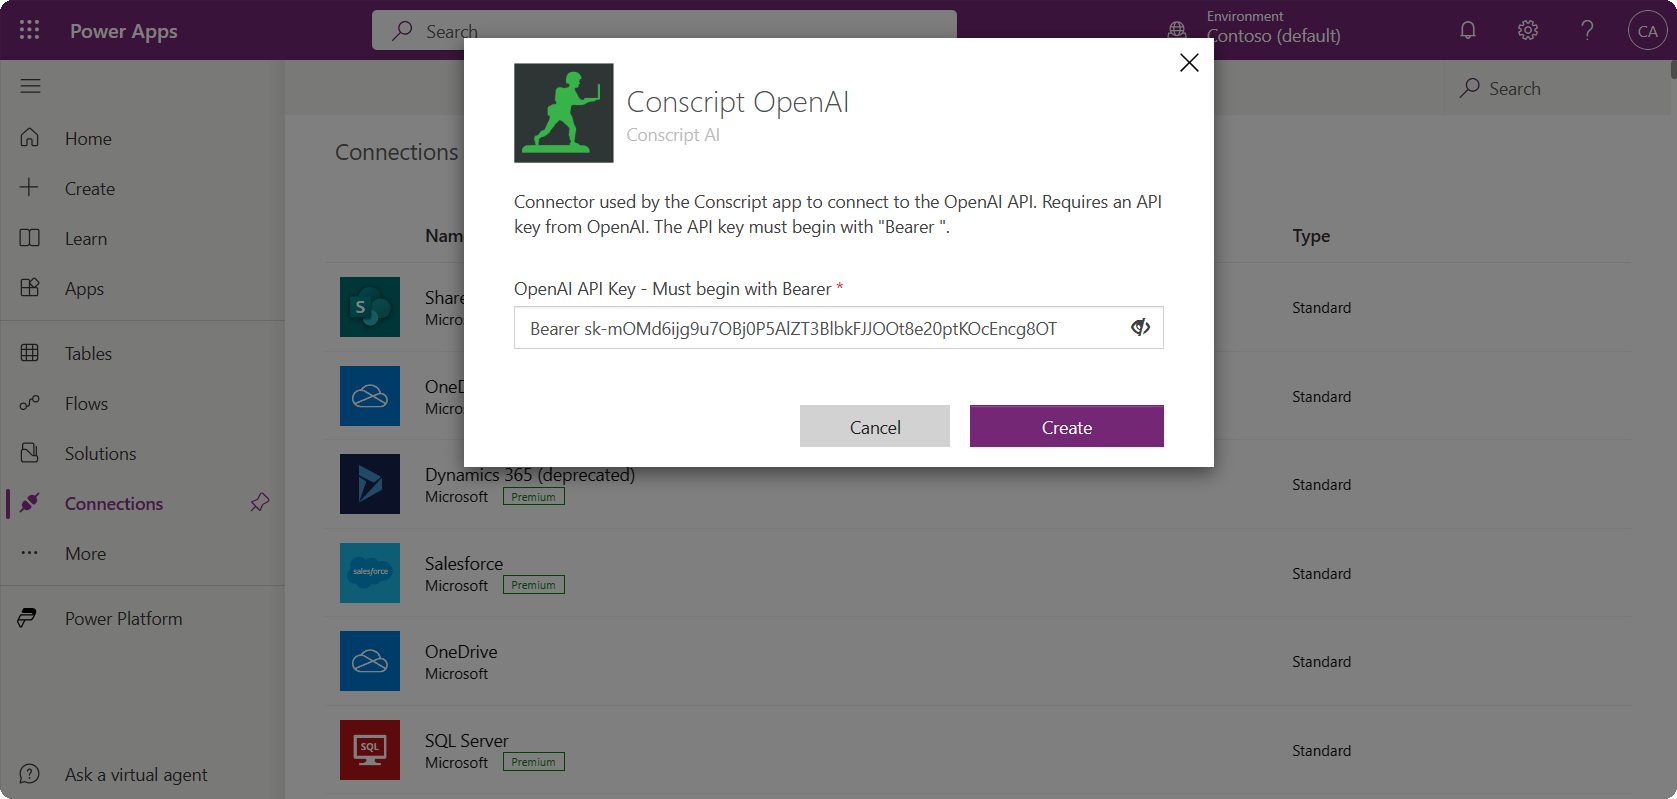
- In the Conscript OpenAI connector configuration page, enter the word Bearer followed by a space, then paste the secret key value.
Look Close
Make sure you put the word Bearer and a space at the start of the API key
Exchange Connection
- Conscript's Exchange Connector requires an App Registration in Entra ID with the Exchange Administrator role assigned. A Global Administrator must follow the steps in the next article to create and configure the App Registration.
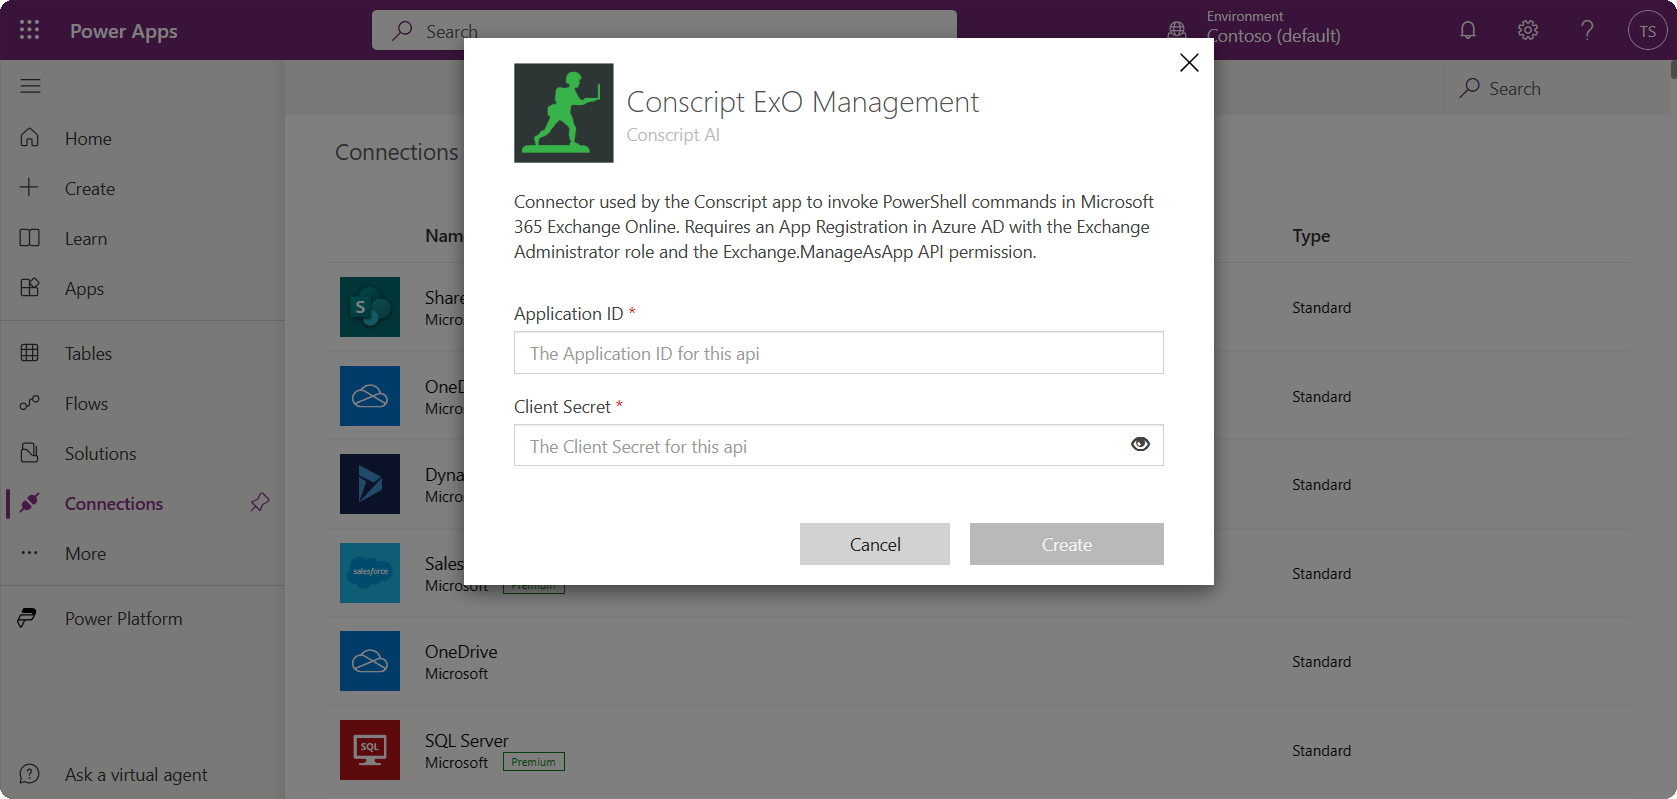
- Once you have the Application ID and Client Secret for the App Registration, enter them in the Conscript Exchange connector configuration page and click Create.
